
A sweltering summer afternoon is the worst possible moment to discover your air conditioner has quit. The temperature climbs, the humidity follows, and suddenly what felt like a minor inconvenience turns into a genuine home comfort crisis. Before you resign yourself to a sweaty evening or an expensive emergency call, there are several practical steps you can take right now. Understanding how your system works — and knowing which problems you can safely address yourself — can mean the difference between a quick fix and an extended outage.
When your cooling system shows signs of trouble, your first instinct should be to act methodically rather than panic. Prompt air conditioning repair starts not with tools, but with observation — identifying symptoms accurately leads to faster, more effective solutions and helps you communicate clearly with a licensed HVAC technician if professional service turns out to be necessary.
Diagnosing the Problem Before You Touch Anything
Most AC failures trace back to a handful of common culprits: a tripped circuit breaker, a clogged air filter, a frozen evaporator coil, or a refrigerant issue. Rushing to disassemble components without first ruling out simple causes wastes time and risks making things worse. Start by checking your thermostat settings — it sounds obvious, but someone may have inadvertently switched the unit to “fan only” mode. Confirm the temperature setpoint is actually lower than the current room temperature.
Next, head to your electrical panel and look for any tripped breakers. Air conditioners draw significant power during startup, and an aging breaker can trip under that load. Reset it once; if it trips again immediately, do not reset it a second time. A repeatedly tripping breaker signals a deeper electrical issue that requires a qualified technician.
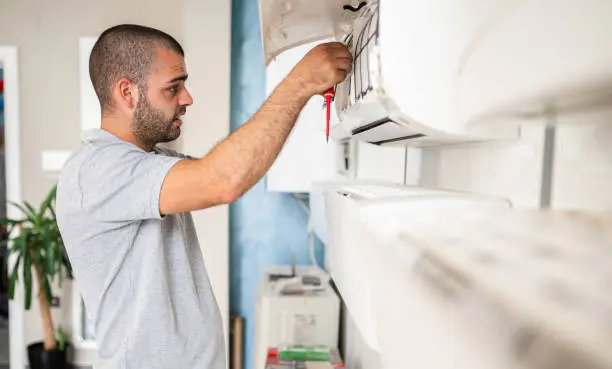
Quick DIY Fixes You Can Safely Try
Replace or clean the air filter
A heavily soiled air filter restricts airflow so severely that the evaporator coil can freeze over, shutting down cooling entirely. Check your filter first — if it’s gray and matted, replace it with a new one rated for your system. After swapping the filter, turn the system to “fan only” for 60 to 90 minutes to thaw a frozen coil before resuming normal cooling mode. This single step resolves a surprisingly large percentage of no-cool complaints.
Clear the condensate drain line
Your AC removes humidity by condensing moisture, which drains through a small PVC pipe. Algae and debris can clog this line, triggering a float switch that shuts down the system as a protective measure. Locate the drain access port near the air handler, pour a cup of distilled white vinegar down the line, and flush it with water. Many homeowners are pleasantly surprised when their system springs back to life after this simple maintenance step.
Inspect the outdoor condenser unit
The condenser needs unobstructed airflow to release heat effectively. Overgrown shrubs, accumulated grass clippings, or debris pressed against the unit can choke airflow and cause the compressor to overheat. Turn off power to the unit at the disconnect box, gently rinse the coil fins with a garden hose from the inside out, and trim any vegetation within two feet of the cabinet. Restore power and monitor the system.
Warning Signs That Require a Professional
Some symptoms are beyond safe DIY territory. Ice buildup that returns shortly after thawing, hissing or bubbling sounds near refrigerant lines, burning odors from the air handler, or a compressor that starts briefly and shuts off — these all indicate systemic problems. In these situations, attempting further air conditioning repair without the right equipment can void warranties, damage components, or create safety hazards. Scheduling service quickly also protects indoor air quality, since a malfunctioning system can struggle to control humidity, encouraging mold growth.
Preventive Steps to Avoid the Next Emergency
The most effective emergency is the one that never happens. A few straightforward habits keep HVAC systems running reliably through the most demanding cooling seasons:
- Replace air filters every 30–90 days depending on household dust levels and the presence of pets — cleaner filters mean better energy efficiency and longer equipment life.
- Schedule annual professional tune-ups before peak summer heat; a technician will check refrigerant charge, clean coils, test electrical connections, and catch small problems early.
- Keep the area around the outdoor unit clear year-round, not just during cooling season — debris buildup during fall and winter accelerates corrosion and reduces airflow.
- Use a programmable or smart thermostat to reduce compressor cycling and prevent the system from running at extreme settings for prolonged periods.
- Check condensate drain lines monthly during high-humidity months; a quick vinegar flush takes two minutes and prevents a flood-related shutdown.
- Listen and observe — unusual noises, longer-than-normal run cycles, warm spots, or unexpected humidity spikes are early warnings worth investigating before they escalate.
Tip: Running your AC with a severely restricted filter can increase energy consumption by up to 15% and significantly shorten compressor lifespan — one of the most expensive components in the entire system.
Conclusion
A broken air conditioner in the heat of summer doesn’t always demand an expensive emergency service call. By checking the basics — filters, breakers, drain lines, and the outdoor unit — many homeowners can restore cooling quickly and safely. The key is knowing where your limits are: straightforward maintenance tasks are fair game, but refrigerant issues, electrical faults, and compressor failures belong to a licensed HVAC professional.
Also Read-